Showing posts with label yarn. Show all posts

Saturday, December 31, 2016

Crocheted Infinity Scarf

A couple of years ago, I bought some yarn that I had not seen or used before.  It's Lago brand and it's very pretty.  It's also very small.  It sat in the stash until I rediscovered it a couple of months back.  I finally decided to use it and I picked an infinity scarf pattern.  I used the pattern on the mink yarn scarf and a scarf for Otter, but they were regular scarves.  I used a very small hook on this yarn since it's small gauge.  I finally finished it today.  It's double stitch and is about 75" long, then joined at the ends with single stitch.


It turned out well.


Close up of the stitches.  It's a silvery blue color.

While it did work, I don't think I really like this yarn.  It's a small gauge but it's not easy to work with.  I used both skeins I had as they are small, and I still have two more in another color.  I don't know if I'm going to use them on another one of these scarves or if I'm going to find something else to make.

Saturday, December 24, 2016

Crochet Related Charity Project


I think I'm going to see if yarn donations can be mailed to them, since this program is in TEXAS and I am not.

Saturday, April 23, 2016

Spring Yarn Wreath Butterfly Butterflies Felt Flower Flowers

Major tendonitis issues at the moment in my right arm, so crochet is temporary not happening.

But I still find things to do!

This is the 2nd yarn wreath I've made.

I started with a styrofoam wreath.


I wrapped it with yarn.  I put a piece of double sided tape on the back of the wreath and that holds the yarn end in place for the first few wrap rounds.  As the yarn is wrapped, it has to be pulled tight periodically and also slipped down against the yarn that is already wrapped.  It needs to be snug so that there are no open spots where the wreath form shows through.


I decided to use felt for the decoration on this wreath.  Because I wanted flowers and a spring feel, I used several different colors.  I did not use all the colors that I bought, my flowers were originally going to be different and have leaves but I changed my mind on that.  I'm sure I'll find a use for it later on!


Probably any glue will work but I bought actual felt glue.


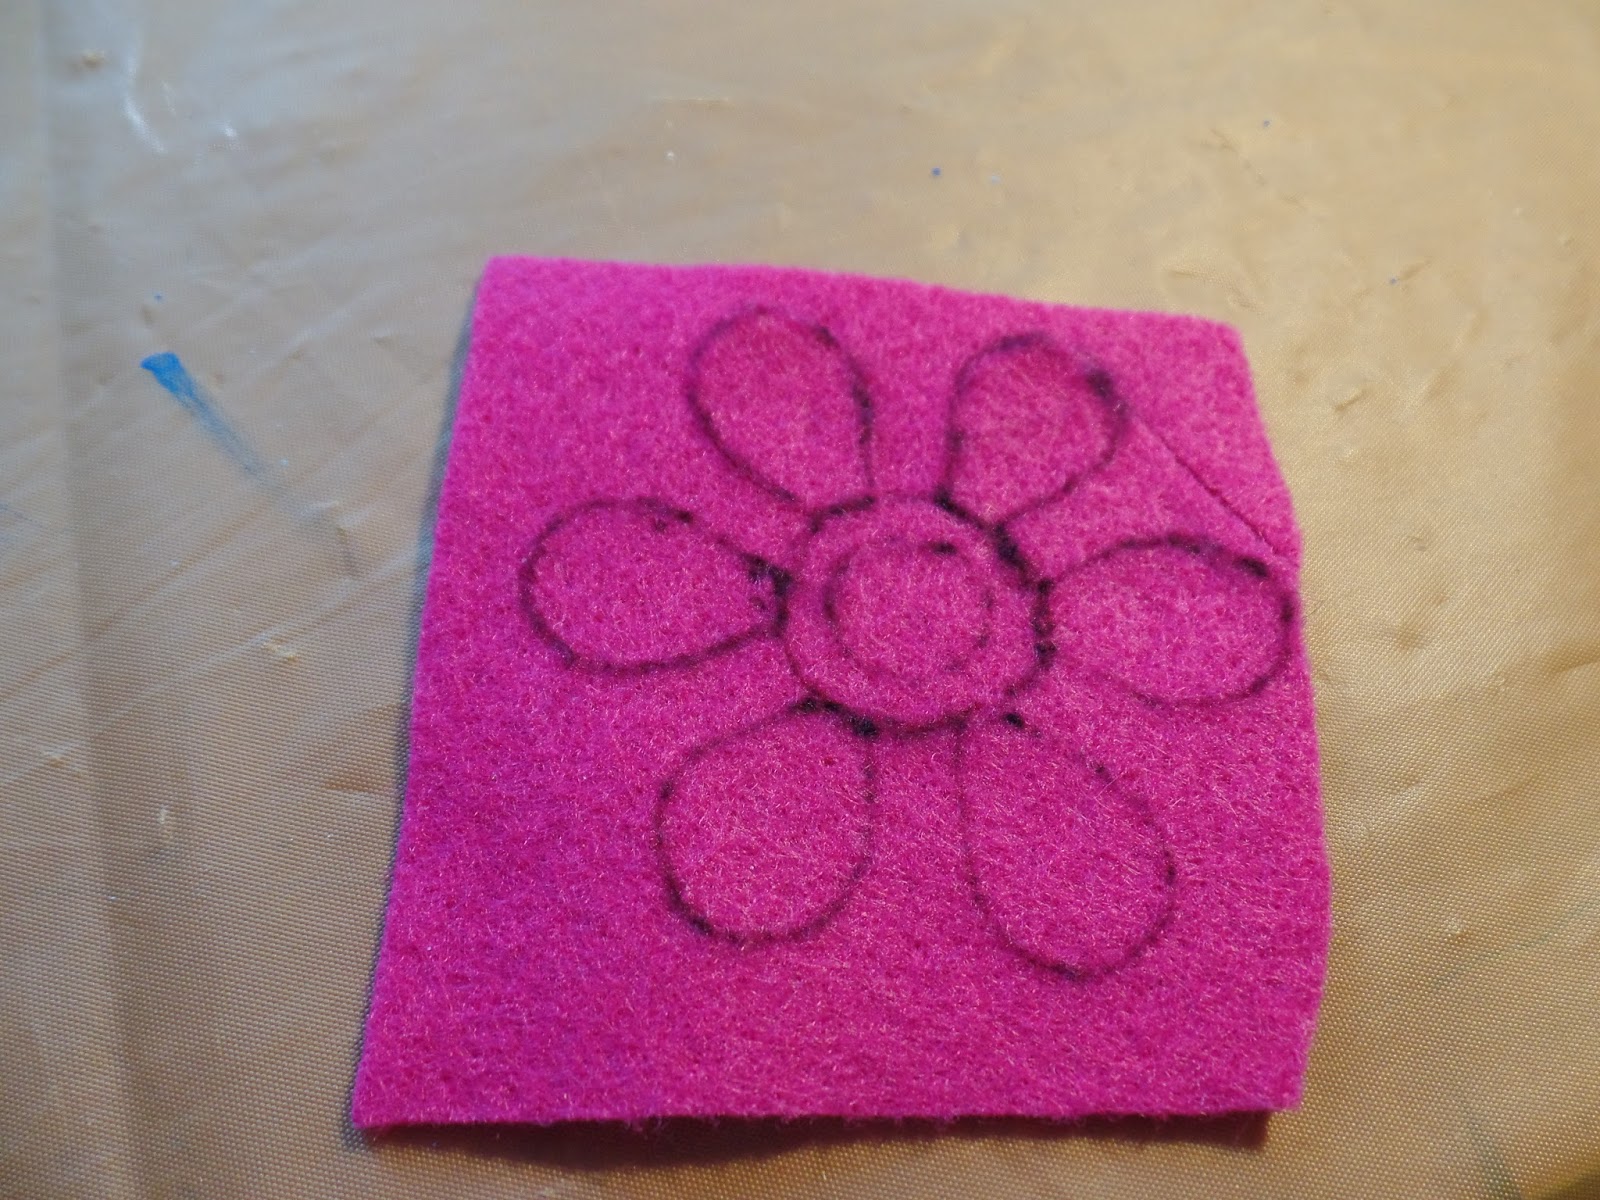
I found a stencil that had a flower shape I liked.


Because I wanted to use the shape as a pattern, I drew the petals and then I also drew the interior circle so that it would be one piece and also the inner circle so I would have a reference point for the hot glue later on.


Trim carefully and use sharp scissors!


I flipped it over because I did not want the lines to show!


I used three different sizes from the stencil.


I staggered the pieces largest to small and made sure that the edges were not even.  Then I used the felt glue to stick the layers together.


I also cut small circles out of yellow felt for the centers of my flowers.


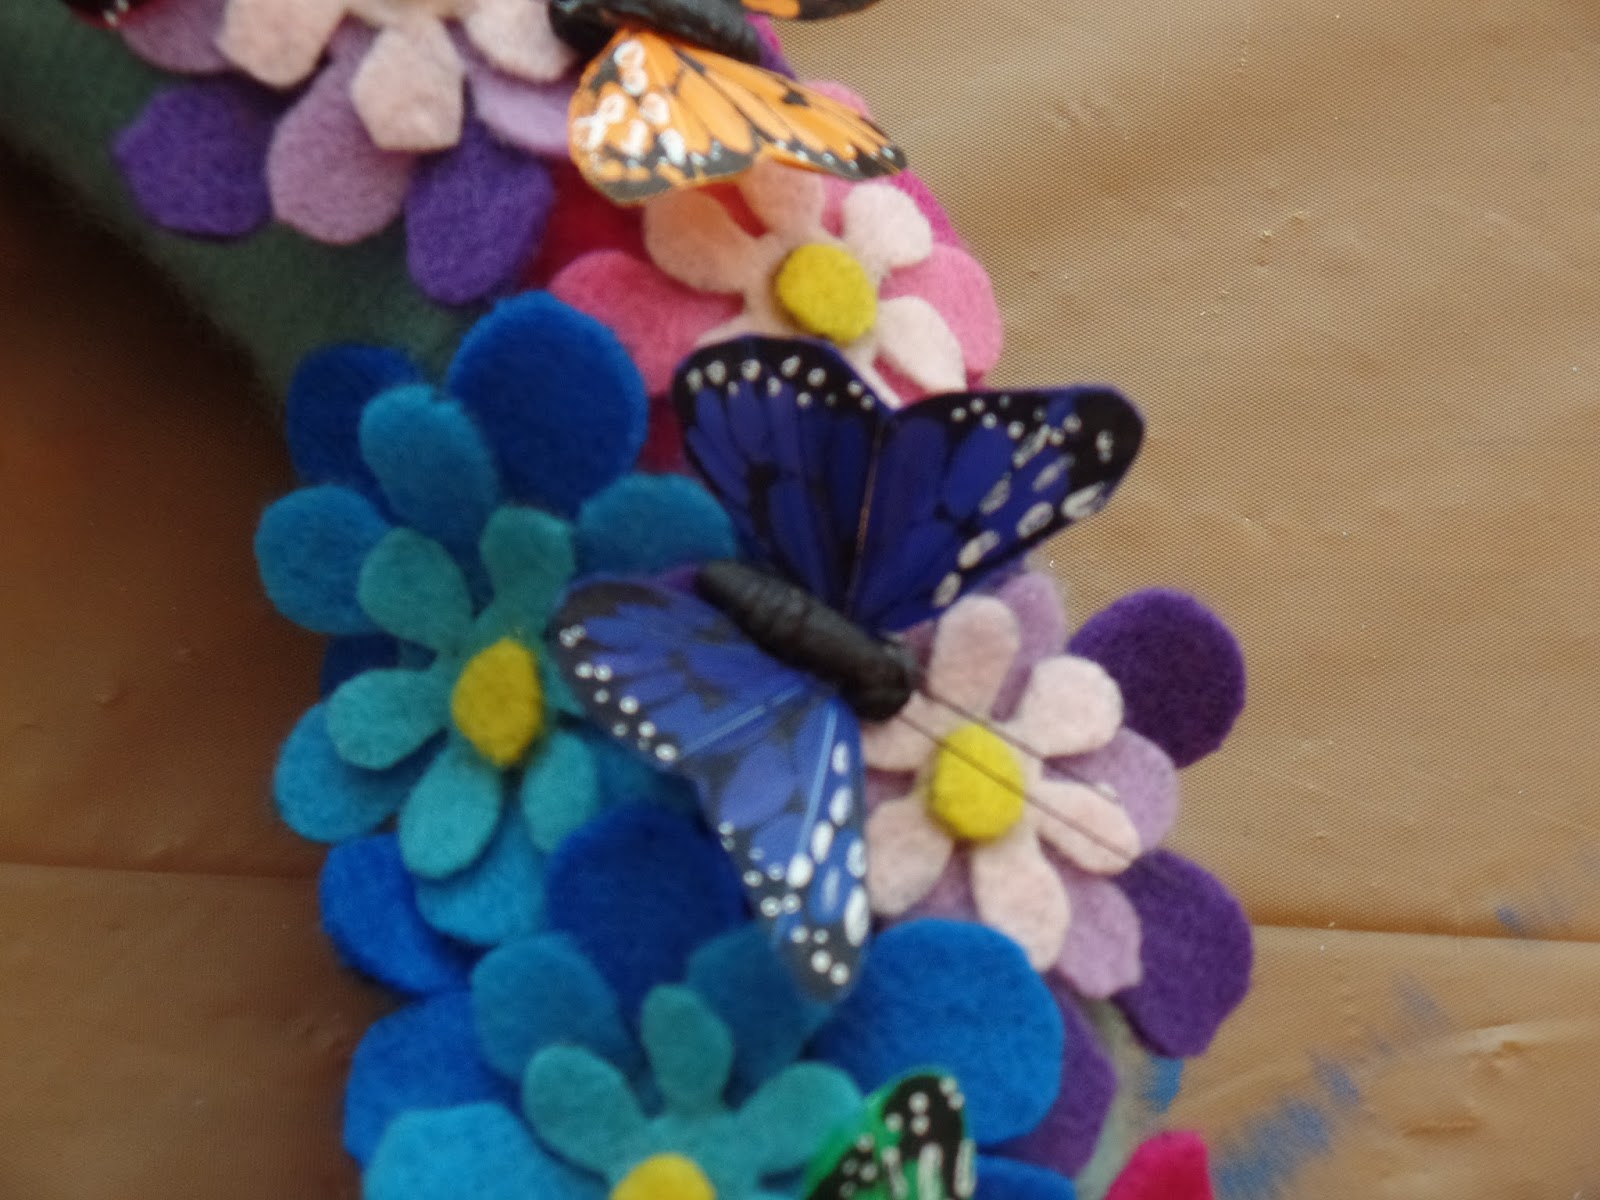
I was originally going to make felt butterflies but I decided to go with feather butterflies instead.  They had wire sticks on the bottom but I pulled the wires out.


The next step was to get out the glue gun!

I placed the flowers on the wreath first and rearranged them until they were where I wanted them.


I glued each one on, one at a time and did not move the rest of them while I was gluing so that they would go on where I wanted them to.  Also, you could take a picture (cell phone or digital camera) to refer to while gluing.  The glue went on the back of the flowers in the center - which is where the center outlines were.


After the flowers were glued, I used the same process with the butterflies.


Sometimes butterflies are solitary bugs but my butterflies were a flock!


I may decide to get a ribbon in a green color similar to the yarn and attach it at the back with the glue gun as a hanger, but for the moment it's done!

Tuesday, March 1, 2016

March is International Crochet Month!

My favorite month!  Not just for the crochet, it's also Otter's birthday on the last day of March.  But this post is about this:


Which means this:


(This is just a very small sample of my yarn stash)


(Yes, everywhere!)


(Yes, great pain.)


Just a few thoughts!

Saturday, October 17, 2015

Today is I Love Yarn Day!!!!!!!

One of my very favorite days, that's for sure.


There is so much that can be done with yarn.


My chosen art/addiction is crochet, which is probably no secret at all.


It doesn't matter if you crochet, knit, weave, or any of several other crafts that involve yarn, today is a good day and I encourage anyone who might be interested in yarn art to find a way to learn and see where it takes you!

Yarn is magic.

Friday, September 18, 2015

Yarn Bombing

The article gets one thing wrong, which is actually a major thing:  IT'S CROCHET.

Yarn Bombing Keeps You Young!

Monday, February 16, 2015

Yarn Bottle Jar Container Holder

I've seen plastic containers at fabric and craft stores that hold yarn.  They keep the yarn in place, clean and from getting tangled while working on something.  They are around $10.00.  I was looking at some one day when I remembered a plastic pickle jar that I'd kept after it was empty for a project that never happened.  Mostly, because I forgot about it!  So, I decided to make my own.  Hubby also found a plastic jar that originally held beef jerky so it got turned into one as well.

Plastic really works better for this than glass.  For one thing, it weighs much less than glass.  Also, glass breaks!  Most lids on glass bottles are metal, plastic bottles usually have plastic lids and that works better because they need a hole drilled in them.


Obviously, any jar you use will need to be clean!  I washed this one twice with warm, soapy water.  The label came off during the washing process and the adhesive was easy to remove while washing.  Some labels might need a little work to get them off; same thing for the adhesive.  Or you can leave the label on if you don't want to deal with removing it.


Hubby drilled the hold in the lid, 1/2" diameter and centered.  I measured the size of the hole in the lid of the bottles at the craft store and they were 1/2".  I don't think that it would work if it were any smaller and most yarn seems to be less than 1/2".

The edges of the hole need to be smoothed, He used a piece of fine grit sandpaper and a wooden dowel to get the edges smooth.


This is the beef jerky jar.  The label is still on it so it's turned to the side for the picture.  The yarn can be left in the skein if it came in one, or it can be rolled into balls.  Skein size varies as well as the yarn gauge itself.  This yarn happens to be mink yarn which is a pretty small gauge.  I put all three yarn balls in the jar to keep them from getting lost.


The yarn strand is inserted through the hole from the jar side.  


I also put the magazine with the pattern I'm using in the jar.  If it was a pattern on a single piece of paper or two, it can be folded and put in the bottle as well.  Also, you might want to put the hook you are using in the bottle as well so that it doesn't get lost either!