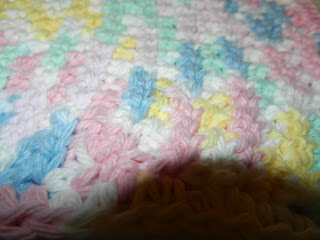
Monday, December 30, 2013

Yarnbombing!

When I posted this, the comments were family friendly.  If they aren't, please remember that I am not responsible.  But, I did notice something that most of the commenters also caught - IT'S NOT KNITTING, IT'S CROCHET!
 
Other than that, it's fun.

Fun Things to Do With Yarn

Friday, October 11, 2013

I Love Yarn Day 2013

Guess what day it is!


I intend to celebrate it much longer than one day, but then I generally observe ILYD 365 days a year.
 
Just a few examples of how:


Tuesday, October 8, 2013

Ripple Afghan Lap Blanket

After nearly 3 years, I finally finished the afghan!  I started it on the way to TEXAS for Thanksgiving, 2010.  I got quite a bit done, but then we had two hot summers in a row and the last thing I wanted to work on was a blanket.  So, it got put aside and then the winters were also warm so it stayed in the closet waiting on me.  I have been working on it a few rows at a time and last Saturday was a wet, chilly day so I worked on it most of the day.  It started out with the idea of becoming a bed-sized blanket, but it really wasn't wide enough so it decided it wanted to be a lap blanket instead.  I figure I can always add to it if I decide to, but I'm thinking that it will probably stay the size it is.
 
21 sets of 4 rows each, 84 rows.  Base row is a chain stitch and the rest are single stitch.  The yarn is by Caron and is very soft.

Here it is!


This is the first actual row.


24 rows, not including the foundation chain stitch row.


Close up of the stitches at 56 rows. 


The safety pin with the orange yarn is to mark my place and keep it from accidentally being frogged when I stopped each time I worked on it.


This is the completed afghan, it's not quite square.  This picture is taken from the bottom, which is the straightest edge but because it's ripple pattern it isn't actually straight edged.


A closer shot of the foundation edge, the corner is flipped up a bit but you can tell that it's straighter.


This is the end edge, the ripple is more evident in this shot.  If I do ever decide to add on, this is where it will happen.
 
I'm just so glad to be done with it!
 
Photography credit:  Otter.

Sunday, September 8, 2013

Wednesday, August 21, 2013

Steampunk Pachinko

I'm sure by now everyone knows that Bill (the hubby) is an avid Pachinko collector.  He also repairs them.  He buys them, repairs and cleans them and then frequently he sells them.  Sometimes for a considerable amount of money, depending on how much work he's put into it.
But sometimes, he keeps them.
This is one that I had the original idea for, and it is a keeper.
We all like steampunk.  So, what better than to make a steampunk Pachinko?
This is the machine Bill started with.  It was in somewhat rough shape and was probably going to be turned into parts anyway, so he took all the pieces off to use in other machines.


Here's a closer shot of it.  It was dirty, which might or might not show up well.


The back of the machine:


 Bill had already started to remove some of the parts from it here.

After everything has been taken off and the background is removed from the frame, this is what it looks like.  The original background is a piece of paper essentially, and it is covered with a piece of clear laminate.  They were printed with assorted colors and shapes.  Some of them are actual themes, this one was basically blobs of color but it was faded.  Also, in the picture above this one you can see what are basically small nails.  Each one has to be removed individually and carefully so the wood is not damaged.  There is a special tool Bill uses, he made it from a cork puller.


After putting the background on the scanner so he can copy it for future use, he got busy with the sander and this is the result:

You can see where the nails were (pins is the actual term) and you can also see discoloration around where the features were - that is water damage.  The background has to be as clean as possible.
This is how Bill keeps the pieces in order and also from getting lost - he uses large Ziploc bags and numbers them. 


He casts his own parts when he has to, and just about anything he finds is fair game to use on a machine.  This machine needed a lot of items created for it.  Steampunk is fairly popular so he could find some things easily, but some pieces had to be created from scratch or were repurposed.


For the background, we looked around until we found a picture we liked.  Our original thought was to use a picture of Big Ben, the clock, with the London Bridge also visible.  But we realized that most of the good parts of the picture would be covered up so we decided to just use a picture of gears.  Most steampunk things tend to be dark anyway.  Bill uses a printer in Tulsa, but the backgrounds he has printed are basically the same stuff that is used in car wraps.  You've probably seen wrapped cars and they look like they've been painted but it is in fact an adhesive "sticker" for lack of a better term.  After applying the background, which is tedious and best done in a dust-free and dog hair-free environment, Bill applies a clear piece of laminate which is thick enough to protect the picture on the background.  The clear piece is actually the hardest to apply.  The picture can be moved very slightly if it's not centered - it's a two or three person job sometimes, but the clear piece has to go down "in place" and it needs to be right.  Because it can NOT be removed, it will bring the bottom picture up with it and the entire background will be ruined.  As soon as each layer, background and then clear, is applied Bill takes a plastic scraper to it and gets out any air bubbles.  It's done between each layer and has to be done immediately upon application.


The backgrounds are 17 1/2" x 22". 
The next step is to work on the wooden frame.  Well, that might be don't first but it is a separate step!  For this one, Bill sanded it down to the wood - sometimes they are painted or have a laminate applied similar to old countertop material.  For this project, he decided to use a slightly dark varnish and then a clear coat.  It took a lot of work, there were a few places in the wood that were damaged and that had to be fixed first.


After finishing the wood work and the background, then it was time to start replacing all the pieces - also known as playing field features.  Since this was a new idea, Bill had a lot of fun figuring out what to use.  We made a few trips to Hobby Lobby and Bill also bought some clock pieces from a clock repairman he knows.
This is the bottom part, Bill made a few adjustments to existing pieces to make them fit the steampunk theme.  The copper tubing is decorative, it doesn't have anything to do with the playability of the machine but it does look good.  The bottom ball tray was repainted, it had the textured filigree already but Bill repainted it and the gold is actually gold leaf that he applied. 


 The next few shots are close-ups of some of the pieces that Bill put on the machine.  The majority of the decorative pieces are new and never intended for use on a pachinko machine.  A lot of them are clock parts, such as the next picture. 


This is the center, or main attraction.  It doesn't spin, although some of the machines do have moving parts.  Bill thought about making it move, but it would have been a little too much.


The gauge in the next picture does not move, but Bill may make some alterations later on so that it will move.

The next picture is a decorative piece that was originally on a pachinko machine, Bill did use some "original" parts.


 A close up of the finished background, all parts are on and working.  The red circle in the upper left-hand corner lights up, most machines have lights or bells to indicate when you are out of balls.  That's what the red circle is, it's a plastic lens and you look at the picture of the pieces after they'd been painted you can see what it looked like before Bill got busy with the gold paint.  He also used copper paint in some places.


The finished product!


This machine will never be sold.  It was a family project and will stay in the family.

Sunday, July 21, 2013

Cotton Kitchen Wash Cloths Cloth Washcloth Washcloths

(Lots of titles because people call things by different names.)
 
I've made several of these wash cloths, they are made with cotton yarn and are intended for dishwashing but they could be used for a lot of other things.
 
These specifically were for my sisterfromanothermother, Virginia.  They are about 8" long.  All single stitch, alternating between back and front post stitches which gives them the textured pattern.  They are finished with a row of single stiches all around.


All three of them, from a slightly different angle.


A close up of the top one in the group picture.


I'm pretty pleased with the way they turn out and they are easy to make.

Friday, July 19, 2013

Blue Granny Square Afghan Lap Blanket

Lots of names for this one!
 
A while back, a long while back actually, I started a project that was supposed to be a robe made out of granny squares.  But it decided it didn't want to be a robe, it wanted to be a lap blanket instead. Sometimes that happens!
 
6 squares by 8 squares, each square is 4 rows of royal blue with a light blue outer row.  Then the squares are stitched together with the same light blue.


 Here's a close up of a square.


This is what it looks like where the rows are stitched together.


The squares are all triple stitch, it's stitched together with single stitches.
 
It's actually going to be pretty warm.

Sunday, March 3, 2013

March Is International Crochet Month & International Craft Month

So you'd better get busy, either crochet or crafting!  It doesn't matter, as long as it's craft-related. :)

(Obviously, crochet is my first choice.  But it doesn't really matter what you choose.)


Sunday, January 20, 2013

Turquoise Blue Double Hug Silky Shawl

This is the one I started and then gave up on more than once.  It seemed to never grow, it was always the same size even after I'd spent a couple of hours on it, I kept adding rows but it never looked like it.  At one point, I was ready to call it done and then donate it.

Part of the problem is that I started it with one hook, which is larger than my preferred hook.  One time when I started back to work on it, after I'd done several rows I discovered that I'd gone back to the smaller hook.  It's not enough to really show, I know the difference because I know where to look.  But even an experienced crochet artist would probably not be able to see it, it's that small.  It's just that I know what I did and where I did it.  I tend to be a bit of a perfectionist, and crochet usually is not a problem for me.
Anyway, I finally finished it.  Although it's not as long as I originally thought it would be.  I just liked the length I got it to, so I put the final ruffle row on and called it good.


This is the 2nd Double Hug shawl I've made.  The first one was green and was a gift for my sister from another mother, Virginia.  This one is a smaller gauge yarn, or smaller size in other words.  Double Hug refers to the fact that the first part is a granny square which is then folded in half, or doubled.  It's supposed to be warmer at the neck and it probably is.  I haven't actually worn it anywhere yet, it hasn't been really cold enough.  It's probably going to be worn to church mainly, it gets cold in there and being a redhead I am naturaly more susceptible to getting cold.  (See my main blog for details on the Redhead Curse.)

The top edge is not straight, which is part of the pattern to an extent but I also made it that way on purpose.


This shows how long it is.  The original pattern was for much longer, but I made it this size because that's the size I like.  If it were for something "formal" then it would probably have been made longer.  While it might not look very long, keep in mind that I am tall, 5' 9" to be precise.  I probably should have pulled my hair out of the way!


A close up.  It's a foundation chain start, which is standard for just about every item that is crocheted.  Then it is made from a granny square base piece, and consists of double stitch and chain stitch.  The double stitches are in groups of three with two chain stitches between each set.  The original pattern called for one chain stitch between groups, but I wanted the extra "curve" on the end so I used two chain stitches between sets of double stitches which made it slightly wider and not as straight edged.


The way I made it with the extra chains between the groups makes it easier to flap one end over the other.  I prefer not to use shawl chains - as in jewelry-type chain, not chain stitches, to keep the sides together.  But that's just me, the shawl I made for Virginia was made slightly closer to the original pattern, it does have the less than straight effect but not as much as this one does.  But part of that is because this yarn is very silky and slippery.  It is acrylic yarn, but it doesn't look or feel like it as it's very silky.  It's by Caron, which makes very good yarn.  I think that the green shawl I made was also Caron yarn, but yarn is not "one size fits all."  There are as many different colors, gauges and textures as there are stars in the sky.  Or at least it seems like it!

I'm glad to be finished with it!  Photography credit:  Otter.